
BOOT FROM SAN - CISCO UCS 240 M5

Configuring QLogic BIOS to Boot from SAN

1. Take it into legacy mode 

Go to Compute > BIOS


2. Configure Boot order 

Boot order also must be created . Go to Compute > BIOS  > Configuration Order 


Go to Advanced and create Add SAN Boot . As we have 2 HBA Qlogic card we need to create 2 SAN BOOT and add the slot accordingly


Name : SAN-BOOT-ORDER

Status : Enabled 

Order : 1

Slot : 4

LUN : 0  ( Note : LUN ID must be verified from storage )

Name : SAN-BOOT-ORDER

Status : Enabled 

Order : 1

Slot : 6

LUN : 0  ( Note : LUN ID must be verified from storage )


3. While booting the server, press Ctrl-Q to enter the Fast!UTIL configuration utility.


4. Do one of the following : 

  • If you have only one host bus adapter (HBA), it is selected automatically, and the Fast!UTIL Options screen appears.

  • If you have more than one HBA, you need to select it manually. In the Select Host Adapter screen, use the cursor keys to select the chosen HBA and press Enter.

    Note: Booting from SAN requires choosing the lowest numbered HBA that has any LUNs visible.


As you can see we have 2 HBA card and total in 4 ports . Now we need to select all those 4 ports inorder to use all of the 4 ports for booting from the lun in case of failover.

 In the Fast!UTIL Options screen, select Configuration Settings and press Enter. ( Noted : Inorder to use all 4 ports we need to configure it all of the 4 ports available.)


Go to Adapter Settings and enable Host Adapter BIOS 


Then go into Selectable boot settings and enabled  selectable boot


NOTE : You will need to enable selectable boot and  Host adapter BIOS in all 4 ports available which has not been displayed in this blog.


5. You will ne able to see the initiator in your storage as well. 


You will now need to create a LUN and attached the host accordingly. 
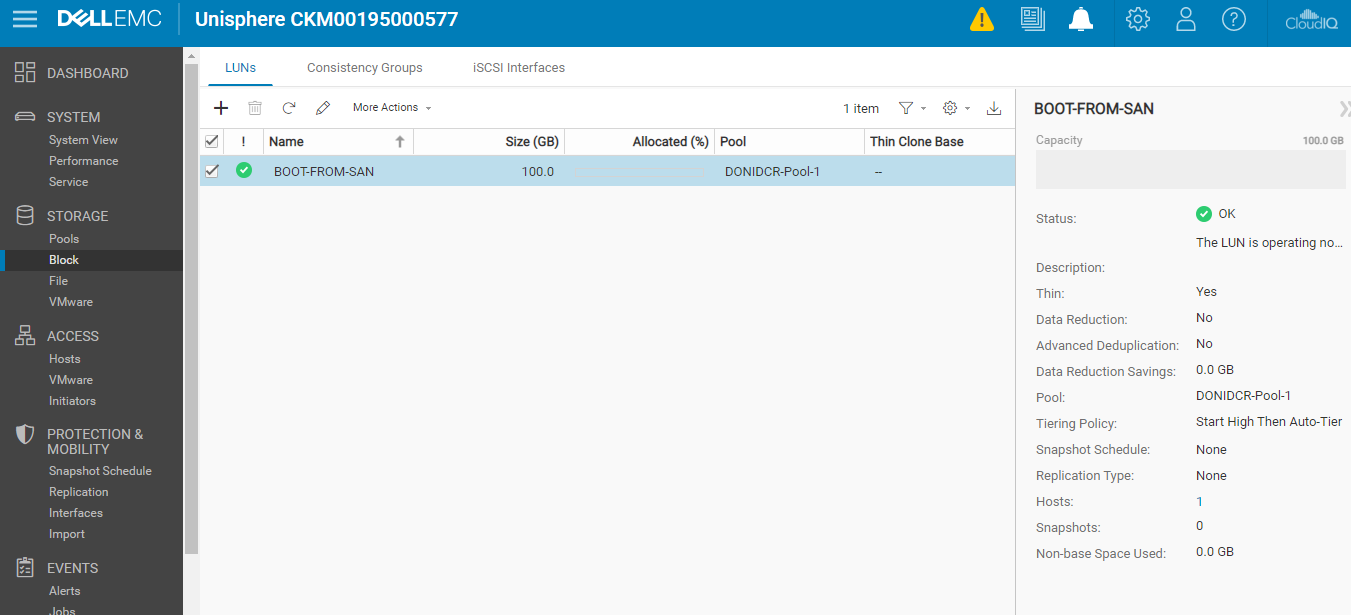


6 .Booting ESXi


As you can see in the below screenshot LUN has been detected.


Reference 

https://kb.vmware.com/s/article/1448

Comments

Popular posts from this blog

SAN Switch Zoning with Brocade

Zoning in Brocade SAN Switch Let's begin with resetting the switch completely. In my environment I have two brocade SAN Switch connecting to 2 Dell R940 server configured with VMware. The SAN switch will be having connectivity between Dell Unity 500 storage and Dell R940 servers. Multipathing will be done between the server and storage with the help of SAN Switch. Multipathing, also called SAN multipathing or I/O multipathing, is the establishment of multiple physical routes between a server and the storage device that supports. It results in better fault tolerance and performance enhancement. DESIGN The idea behind zoning is that intended WWPN talk with each other . This is more like ACL in the world of Ethernet. To see the devices which are logged into the switch the following commands can be executed. SAN-A:admin> switchshow switchName: SAN-A switchType: 118.1 switchState: Online switchMode: Native switchRole: Principal switchDomain: 1 switchId: ...

Device Mapper Multipath with LVM in Oracle Linux

This blog describes you the step by step procedure for configuring multipath in liunx using Device Mapper and will also help you understanding what Device Mapper is. Simply stating Device Mapper is an interface to Linux Kernel which helps us to configure multiple I/O path between the server and the storage arrays.  Device Mapper interface allows the linux kernel to communicate with LVM Logical Volumes, EVMS Volumes , Software RAID, multipath and many other solutions. Multipathing is a must for all those mission critical applications as we all know that data is the most important thing in an enterprise network . Let me now share the installation process for multipathing. Installing Device Mapper #yum install device-mapper-multipath -y #rpm -qa | grep device-mapper Enabling Multipath #cp /usr/sare/doc/device-mapper-multipath - */multipath.conf   /etc/multipath.conf #mpathconf -enable -user_firendly_names n #modprobe dm_multipath #lsmod | grep dm_multip...

SSL Decryption FortiGate

  We have pretty much heard about SSL decryption and of malware hiding inside an encrypted traffic. A large amount of traffic in the internet is pretty much encrypted which basically means that bad things like malware, virus, ransomware can hide inside this encrypted traffic. If majority of these traffic are encrypted our Firewalls are not able to analyze these traffic which can easily infect our organization and the investment which we have done in these firewalls are wasted. There does come around a solution for this and as my topic suggest SSL Decryption also know as Deep Packet Inspection as by some IT folks. The image that I have attached down below clearly suggest about what I am trying to explain. Using deep packet inspection, the firewall simply decrypts the encrypted traffic happening  between client and server, inspects the content to find the threats and block them , then forwards it to the destination re-encrypting it . We will need to first setup the SSL/SSH in...